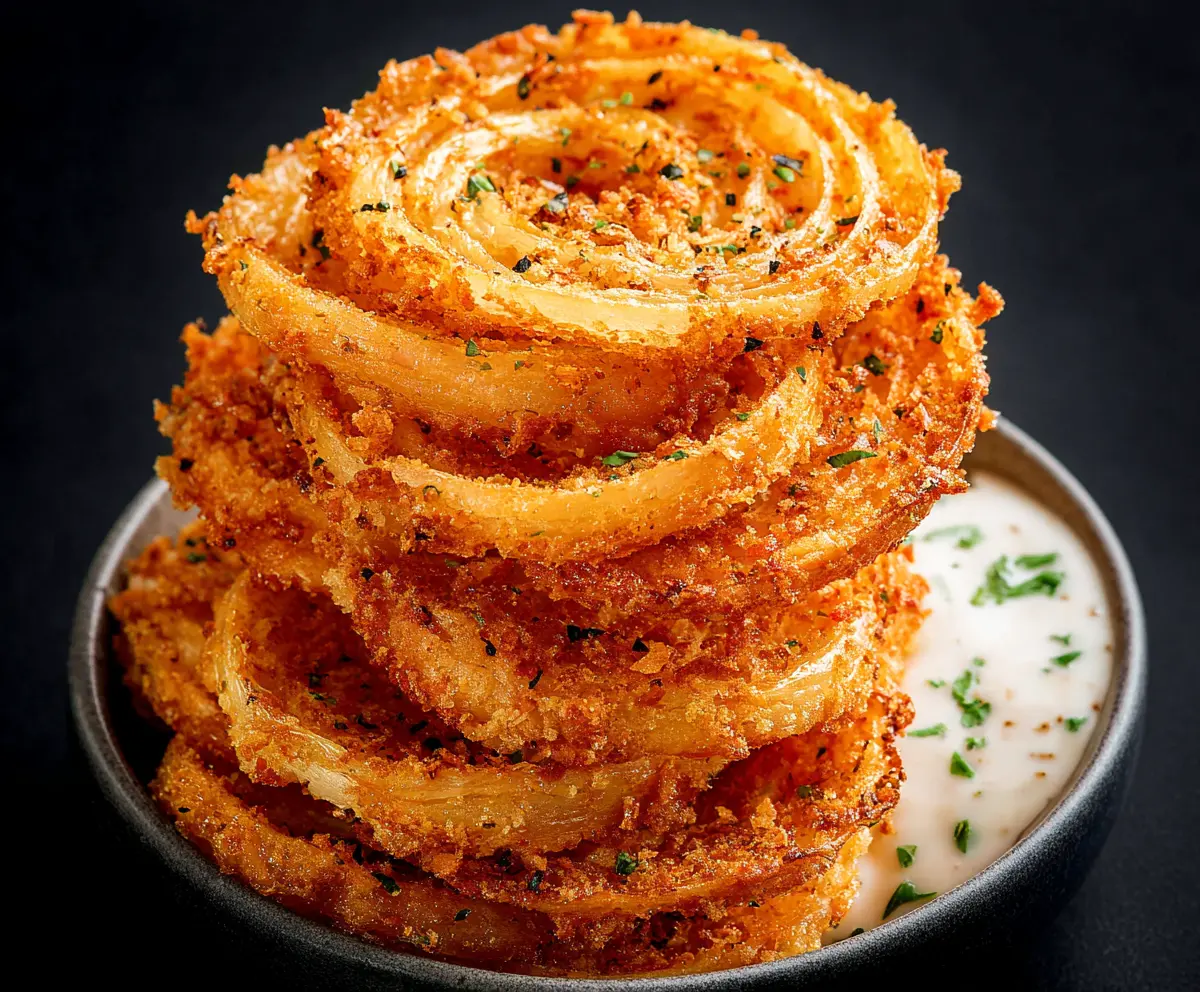
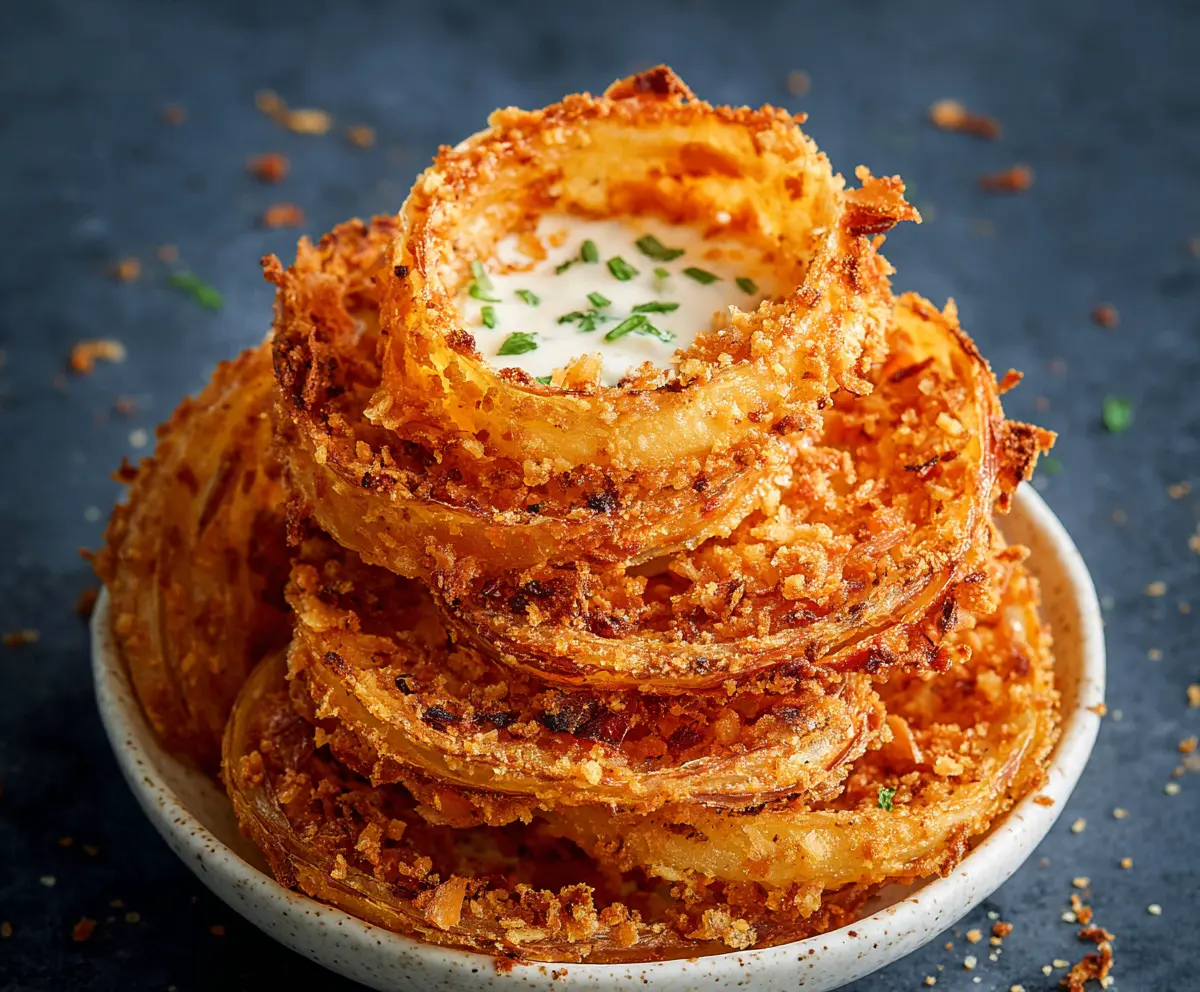
Crispy Parmesan Onion Ring Chips are a tasty twist on classic onion rings that bring a crunchy, cheesy burst of flavor in every bite. These chips have a golden, crispy coating thanks to the Parmesan cheese, making them extra special and sounding like the perfect snack or side dish. The onion rings are thinly sliced and baked or fried until they get that irresistible crispiness.
I love making these because they’re quick to prepare, and the Parmesan gives them a nice salty kick that makes everyone reach for more. A little tip I use is to make sure the onion slices are evenly coated and not too thick, so they cook up just right and stay crunchy. They’re fun to eat and feel a bit fancy without much effort at all.
These crispy chips are fabulous served with a simple dipping sauce like ranch or a garlic mayo, and I like to share them when friends drop by because they’re such a crowd-pleaser. Whether it’s movie night or a casual get-together, these onion ring chips add a perfect crunchy and cheesy touch to any occasion. They’re one of those easy recipes that always bring a little extra joy to snack time.
Key Ingredients & Substitutions
Onions: Yellow or white onions are best; they’re sweet but sturdy enough to hold their shape. For a milder taste, try sweet onions like Vidalia. Slice evenly for consistent cooking.
Panko Breadcrumbs: Panko gives great crunch. If unavailable, regular breadcrumbs work, but the texture will be less crispy. For gluten-free versions, use gluten-free panko.
Parmesan Cheese: Adds salty, nutty flavor and helps crispiness. Grate fresh for best taste. You can substitute with Pecorino Romano or a sharp Asiago if desired.
Flour & Egg Wash: Flour helps the coating stick, and the egg wash binds the breadcrumbs to the onion rings. For egg-free, try a mix of milk and mustard or plant-based milk with a bit of flour.
How Can I Make Sure the Onion Rings Turn Out Crispy and Not Soggy?
Getting that perfect crunch is all about prep and frying technique. Here’s what I do:
- Slice onions evenly, about 1/4-inch thick; too thick and they won’t cook through, too thin and they get mushy.
- Pat the onion rings dry before coating to help the batter stick better.
- Use a three-step coating: flour first, then egg wash, then the panko-Parmesan mix. This triple layer locks in crispiness.
- Don’t overcrowd the pan when frying—this keeps the oil temperature steady for even cooking.
- Fry at 350°F (175°C) so they crisp quickly without absorbing excess oil.
- Drain rings on paper towels after frying and serve immediately for best crunch.
Equipment You’ll Need
- Deep skillet or frying pan – perfect for frying onion rings evenly without crowding.
- Thermometer – helps keep the oil at the right temperature for crispy results.
- Three bowls – for flour mix, egg wash, and panko-Parmesan coating to stay organized.
- Slotted spoon or tongs – makes it easy to flip and remove onion rings from hot oil safely.
- Paper towels – to drain excess oil and keep onion rings crispy.
Flavor Variations & Add-Ins
- Add cayenne pepper or chili powder to the breadcrumb mix for a spicy kick I love on game day.
- Try adding finely chopped fresh herbs like rosemary or thyme into the coating for a fresh aroma.
- Use smoked paprika instead of regular paprika for a subtle smoky flavor that’s great with dips.
- Swap Parmesan for grated mozzarella or cheddar for a different cheese flavor and melty texture.
How to Make Crispy Parmesan Onion Ring Chips
Ingredients You’ll Need:
For the Onion Rings:
- 2 large onions (yellow or white), peeled and sliced into 1/4-inch thick rings
- 1 cup all-purpose flour
- 2 large eggs
- 1/2 cup milk
- 1 cup panko breadcrumbs
- 1/2 cup grated Parmesan cheese
- 1 teaspoon garlic powder
- 1 teaspoon paprika
- 1 teaspoon salt
- 1/2 teaspoon black pepper
- 2 tablespoons chopped fresh parsley (optional, for garnish)
- Vegetable oil, for frying
- Optional: ranch dressing or garlic mayo for dipping
How Much Time Will You Need?
This recipe will take around 10 minutes to prep and about 10 minutes to cook. So, in about 20 minutes, you can be enjoying your crispy, cheesy onion ring chips!
Step-by-Step Instructions:
1. Prepare the Onion Rings:
Gently separate the onion slices into individual rings. If some break or are smaller, save them for snacking or other uses.
2. Make the Coating Mixes:
In one bowl, mix the flour with paprika, garlic powder, salt, and black pepper. In another bowl, beat the eggs and milk together. In a third bowl, combine the panko breadcrumbs and grated Parmesan cheese.
3. Coat the Onion Rings:
Heat vegetable oil in a deep skillet or fryer to 350°F (175°C). Take each onion ring and first dip it in the flour mixture, shaking off any extra. Then dip it into the egg mixture, allowing the excess to drip off. Lastly, press the onion ring into the panko-Parmesan mix until it’s fully covered.
4. Fry to Crispy Perfection:
Fry the coated onion rings in batches—don’t crowd the pan. Cook each batch for 2 to 3 minutes per side, or until they turn golden brown and crunchy. Use a slotted spoon to remove the rings and let them drain on paper towels.
5. Serving:
If you like, sprinkle the onion rings with freshly chopped parsley while they’re still warm. Serve them right away with your favorite dipping sauce, like ranch or garlic mayo.
Enjoy your tasty, crispy Parmesan onion ring chips!
Can I Bake Instead of Frying the Onion Rings?
Yes! To bake, preheat your oven to 425°F (220°C) and place the coated onion rings on a greased baking sheet. Spray them lightly with cooking spray and bake for about 15-20 minutes, flipping halfway through, until golden and crispy.
Can I Use Frozen Onion Rings for This Recipe?
It’s best to use fresh onions for maximum crispiness. If using frozen, thaw completely and pat dry to remove moisture before coating to avoid sogginess.
How Should I Store Leftover Onion Rings?
Store leftovers in an airtight container in the fridge for up to 2 days. Reheat them in the oven at 375°F (190°C) for 5-7 minutes to help bring back their crunch.
What Can I Substitute for Parmesan Cheese?
You can swap Parmesan with Pecorino Romano or Asiago cheese for a similar nutty flavor. For a dairy-free option, try nutritional yeast, but note it will change the texture slightly.