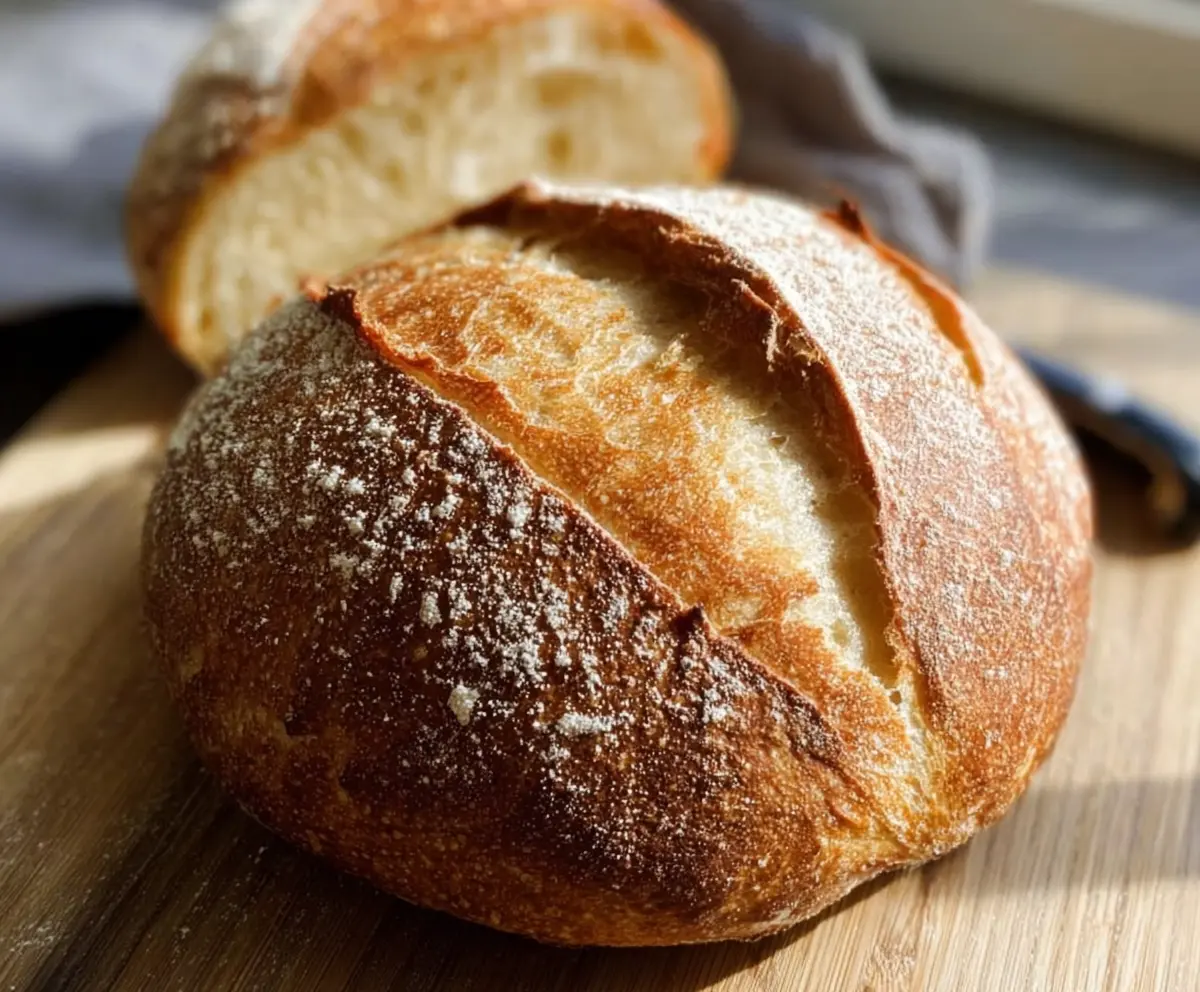
This Best Ever Sourdough Bread is a simple, hands-on recipe that brings out the tangy flavor and chewy texture that sourdough lovers dream about. The crust is beautifully crisp, while the inside stays soft and full of those classic air pockets that make each slice so special. It’s all about using just a few basic ingredients — flour, water, salt, and your trusty sourdough starter — but turning them into something truly delicious.
I love how this recipe breaks everything down into easy steps, so even if you’re new to sourdough, you’ll feel confident giving it a try. I find that spending a little extra time with the dough, folding it gently and letting it rest, really makes the bread come alive. It’s a bit like a cozy ritual for me, slowly seeing the dough rise and change as it ferments.
One of my favorite ways to enjoy this bread is fresh out of the oven with just a little butter melting on top. It’s also perfect for sandwiches, toasting, or just serving alongside a big bowl of soup. I always feel proud sharing a loaf of homemade sourdough with family and friends — it’s one of those simple things that makes everyone’s day a little brighter.
Key Ingredients & Substitutions
Bread Flour: This is the heart of your sourdough. It has more protein, which helps make the dough strong and chewy. If you can’t find bread flour, all-purpose flour works, but your bread might be a bit softer.
Water: Room temperature water is best for activating your starter and relaxing the dough. Filtered or bottled water is good if your tap water is heavily chlorinated, which can slow fermentation.
Sourdough Starter: Your starter is the natural yeast source. It should be bubbly and active. If you don’t have one, you can find starters online or in some stores, or you could skip sourdough and use commercial yeast though the flavor will change.
Salt: Salt controls fermentation and enhances flavor. Don’t skip it—bread without salt tastes bland and the dough structure suffers. Use fine sea salt or kosher salt for best results.
How Do You Get That Perfect Crust and Airy Texture?
The key lies in technique and patience. Here’s how to make your sourdough shine:
- Autolyse: Mixing just flour and water first lets the flour hydrate and gluten form gently, making your dough easier to handle.
- Stretch and Folds: Instead of kneading, gently stretching and folding strengthens the dough without tearing. Doing it repeatedly during the first two hours helps trap air.
- Proofing: Letting your shaped dough rest until slightly puffy helps develop flavor and lets the yeast do its magic.
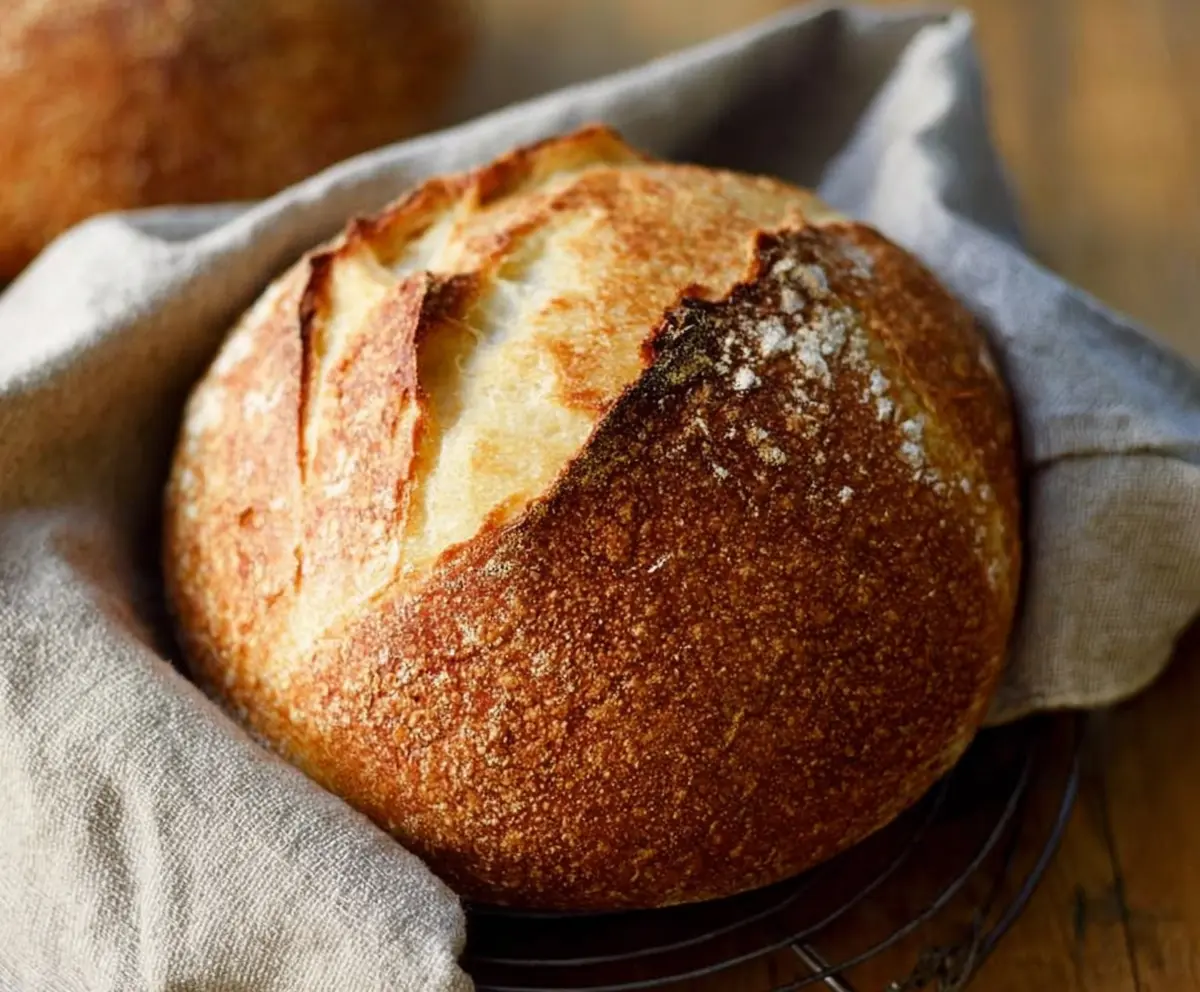
- Scoring: Use a sharp blade to make a quick slash on top before baking. This controls how the bread expands and creates that classic look.
- Steam Baking: Baking in a covered Dutch oven traps steam, keeping the crust soft at first to allow good rise, then crisping it once you remove the lid.
Remember, sourdough is a slow process and every kitchen is a bit different. Don’t rush and trust the dough’s feel and look. You’ll be rewarded with a loaf that’s crispy outside, chewy inside, and full of flavor.
Equipment You’ll Need
- Large mixing bowl – big enough for easy mixing and dough expansion.
- Dutch oven with lid – traps steam for a crispy crust and great oven spring.
- Banneton or bowl with a floured towel – helps the dough keep its shape during the final proof.
- Bench scraper – great for handling sticky dough and shaping without mess.
- Sharp knife or lame – needed to score the dough so it can expand evenly while baking.
- Kitchen scale – for accurate measuring of flour, water, and starter, which is key in baking.
Flavor Variations & Add-Ins
- Mix in whole wheat or rye flour (up to 30%) for deeper flavor and a heartier texture.
- Add herbs like rosemary or thyme to the dough for a fresh, fragrant twist.
- Stir in toasted seeds (sunflower, flax, sesame) before shaping to add crunch and nutty notes.
- Include olives or dried fruit for a flavorful, savory or sweet surprise inside your loaf.
Best Ever Sourdough Bread
Ingredients You’ll Need:
For The Dough:
- 500g bread flour (about 4 cups)
- 350g water (about 1.5 cups), room temperature
- 100g active sourdough starter (about ½ cup), fed and bubbly
- 10g salt (about 2 teaspoons)
- Additional flour for dusting
How Much Time Will You Need?
This recipe requires about 30 to 60 minutes of initial mixing and resting (autolyse), followed by 4 to 6 hours of bulk fermentation with stretch and folds, and 1 to 2 hours of final proof. Baking takes about 40 to 45 minutes. Overall, plan for roughly 7 to 9 hours from start to finish, including resting times, though much of that is hands-off.
Step-by-Step Instructions:
1. Mix the Dough
In a large bowl, combine the bread flour and water. Stir well until no dry flour remains. Cover the bowl and let it rest for 30 to 60 minutes. This resting period is called autolyse and helps the flour hydrate and gluten to start developing.
2. Add Starter and Salt
Add your active, bubbly sourdough starter and the salt to the dough. Mix thoroughly until everything is fully combined. You can do this by hand for a few minutes until the dough feels uniform.
3. Bulk Fermentation and Stretch & Folds
Cover the bowl with a damp towel and let the dough rise at room temperature for about 4 to 6 hours. During the first 2 hours, perform a series of “stretch and folds” every 30 minutes: reach under the dough, gently stretch it, and fold it over the top. This strengthens the dough and helps develop structure.
4. Shape the Dough
Lightly flour your work surface. Turn the dough out and gently shape it into a tight, round loaf by folding the edges underneath. Create tension on the top by rotating the dough and pulling it towards you gently but firmly.
5. Second Rise / Proof
Place the shaped dough seam-side up into a floured banneton or bowl lined with a floured kitchen towel. Cover and let it proof at room temperature for 1 to 2 hours, until it looks slightly puffy but not fully doubled.
6. Preheat the Oven
About 45 minutes before baking, put a Dutch oven or heavy lidded pot into your oven and preheat it to 450°F (230°C). This helps create steam inside the pot for a crispy crust.
7. Score and Bake
Carefully remove the hot Dutch oven from the oven. Turn your dough out onto a piece of parchment paper, seam-side down. Score the top of the dough with a sharp knife or lame in a curved slash. Lift the dough with the parchment and place it inside the Dutch oven. Cover and bake for 20 minutes.
8. Finish Baking
Remove the lid and bake for another 20 to 25 minutes until the crust is a deep golden brown and beautifully crisp.
9. Cool
Take the bread out of the oven and transfer it to a wire rack. Let it cool completely before slicing to allow the crumb to finish setting.
Enjoy your wonderfully crusty, soft, and tangy homemade sourdough bread!
Can I Use All-Purpose Flour Instead of Bread Flour?
Yes! All-purpose flour can work if you don’t have bread flour, but your sourdough may turn out a bit less chewy and with a slightly softer crust. Just follow the recipe as is and enjoy your loaf.
How Do I Know When My Starter Is Ready to Use?
Your sourdough starter should be bubbly, doubled in size, and have a pleasant tangy smell. Feed it about 4 to 8 hours before you plan to mix your dough, depending on room temperature, so it’s active and lively.
Can I Refrigerate the Dough During Proofing?
Absolutely! After shaping, you can proof the dough covered in the refrigerator for 12 to 24 hours. This slow cold fermentation develops deeper flavor. Just take it out and let it come to room temperature for about an hour before baking.
How Should I Store Leftover Bread?
Store leftover sourdough at room temperature in a paper bag or wrapped in a clean kitchen towel to maintain the crust’s crispness. For longer storage, slice and freeze the bread, then toast or warm slices directly from the freezer.